
Confirm your age
Please verify that you are 18 years of age or older to enter this site.



Last Updated: August 6, 2026
Knowing how to serve cocktails without bar tools is one of the most useful skills a home entertainer can have. At Letterbox Cocktails, we hear this question all the time: "Do I really need all that kit?" The honest answer is no. A cocktail shaker, jigger, and strainer are lovely to own, but your kitchen already has everything you need to make genuinely good drinks.
Before you start mixing, gather a few things from around the house:
That is your home bar kit. Nothing fancy, nothing expensive. The techniques below will show you how to use each one properly so your drinks taste as good as anything you would order at a bar.
According to the UK Bartenders' Guild on home cocktail techniques, the fundamentals of cocktail making come down to four things: chilling, dilution, measurement, and mixing. All four are achievable without specialist tools.
The cocktail shaker is the most iconic piece of bar equipment, but it is also the easiest to replace. What a shaker actually does is combine ingredients while chilling them rapidly and adding a small amount of dilution from the melting ice. Any vessel that is watertight and can be sealed will do the same job.
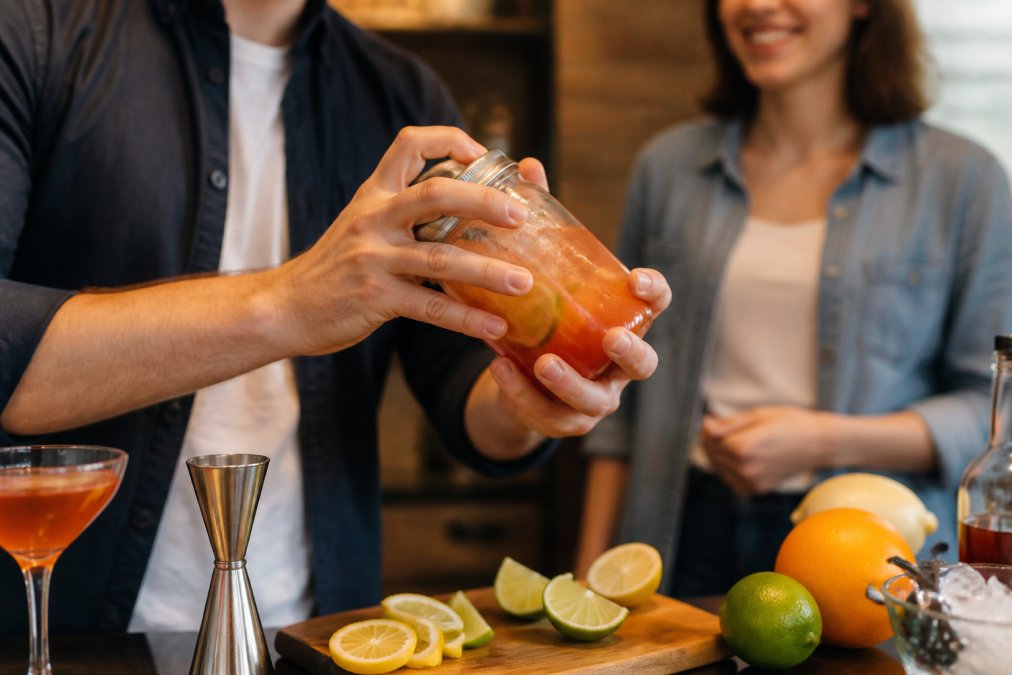
The jam jar method is the most reliable DIY cocktail shaker substitute. Choose a jar with a capacity of at least 500ml so there is room for the ice to move around. The movement of the ice is what chills and aerates the drink.
Here is how to do it:
A common mistake is not shaking long enough. Twelve seconds feels like a long time when your hands are going numb, but that chill is exactly what you want. The outside of the jar should be frosty.
This method works well if you do not have a suitable jar but do have two cups or mugs of similar size. It is the technique bartenders call a "rolling" method, and it is used for drinks where you want mixing and chilling without too much aeration.
This works particularly well for drinks like a Negroni or a Whisky Sour where you want a smooth, integrated flavour profile rather than a frothy one.
Measuring cocktail ingredients without a jigger is simpler than most people think. Cocktail recipes are built on ratios, not exact volumes, so as long as you are consistent with your measurements, your drinks will taste right.
The key principle: whatever you use as your unit of measurement, use it for every ingredient in that recipe. A tablespoon of spirit, a tablespoon of citrus, half a tablespoon of syrup. The ratio stays the same.
Your kitchen spoon set is a surprisingly accurate measuring tool for home bartending. Here is a quick reference:
Cocktail Measurement |
Kitchen Equivalent |
|---|---|
1 shot (25ml) |
1 tablespoon + 2 teaspoons |
1.5 shots (37.5ml) |
2 tablespoons + 1 teaspoon |
Double shot (50ml) |
3 tablespoons + 1 teaspoon |
Dash (1-2ml) |
A quick pour, less than a teaspoon |
Splash (5ml) |
1 teaspoon |
1 oz (30ml) |
2 tablespoons |
A standard UK tablespoon holds 15ml. Most cocktail recipes from American sources use ounces, where 1 oz equals roughly 30ml or 2 tablespoons. Keep that conversion handy and you can follow any recipe in the world with nothing more than your cutlery drawer.
Straining cocktails without a strainer is one of the easier substitutions to make. The goal of straining is simply to keep ice chips, fruit pulp, and herb fragments out of your finished drink. Several kitchen items do this well.
Your best options:
The difference between a standard strain and a double strain (or fine strain) matters for certain drinks. An Amaretto Sour with egg white, for example, benefits from a fine strain through muslin to remove any foam or shell fragments. For a simple gin and tonic built in the glass, straining is not needed at all.
As the Craft Cocktail Academy's guide to home bartending explains, fine straining is what separates a cloudy homemade drink from a clear, polished one.
This is where home bartending gets genuinely interesting. The techniques of stirring, muddling, and chilling are easy to replicate with everyday items, and understanding why each one matters will make you a better home bartender immediately.
The choice between stirring and shaking is one of the most important decisions in mixology. Stirring is the right technique for spirit-forward cocktails, where you want clarity and a silky texture. Shaking is right for drinks that contain citrus juice, cream, or egg white, where you want aeration and emulsification.
A simple rule: if every ingredient in your recipe is clear, stir it. If there is juice or anything cloudy, shake it.
To stir without a bar spoon, use a long-handled spoon, a chopstick, or even a butter knife. Add ice to your glass or jar, pour in your ingredients, and stir in a smooth circular motion for about 30 seconds. The goal is to chill and dilute without introducing air bubbles. Keep the motion gentle and consistent.
Muddling is the technique of gently crushing fresh ingredients to release their oils and juices. A wooden spoon handle is the most effective household muddler substitute. The end of a rolling pin works well too.
The key word is gently. A common mistake is to bash the ingredients as hard as possible. For herbs like mint, you only want to bruise them, not shred them. Shredding mint releases bitter compounds that will make your drink taste harsh. For citrus fruit, firm pressure is fine.
Here is the technique:
A chilled glass keeps your cocktail cold for longer and prevents immediate dilution from a warm glass melting the ice. Most professional bars keep glasses in a freezer, but there are two easy methods at home.
Method 1 - Ice and water: Fill your glass with ice and cold water while you prepare your drink. Tip it out just before you pour. The glass will be cold and slightly wet inside, which is perfect.
Method 2 - The freezer: If you have space in your freezer, pop your glasses in for ten minutes before you need them. A standard rocks glass or coupe will chill quickly.
Temperature control is one of the details that separates a good home cocktail from a great one. It costs nothing and takes no extra equipment.
Batching cocktails for a group is the smartest thing you can do when you are entertaining. Instead of making individual drinks one at a time, you scale up the recipe and make everything in advance. This is sometimes called "build in glass" batching, and it removes almost all of the effort on the night.
Here is a straightforward approach for groups of six to eight:
For a group of ten or more, consider making two or three different batches rather than one very large one. This gives guests a choice and means you are not trying to manage a five-litre jug of cocktail.
Simple syrup is easy to make in batches too. Combine equal parts sugar and hot water, stir until dissolved, and store in a clean bottle in the fridge. It keeps for several weeks and is a building block for dozens of cocktail recipes.
A note on safety and hygiene: when batching cocktails, use clean equipment throughout, keep batched drinks refrigerated, and always label containers clearly if you are making multiple recipes. This is especially important if any guests have dietary requirements or allergies.
All of the techniques above are genuinely useful, and they will serve you well. But sometimes you want a perfect cocktail without any of the effort. That is exactly what Letterbox Cocktails was built for.
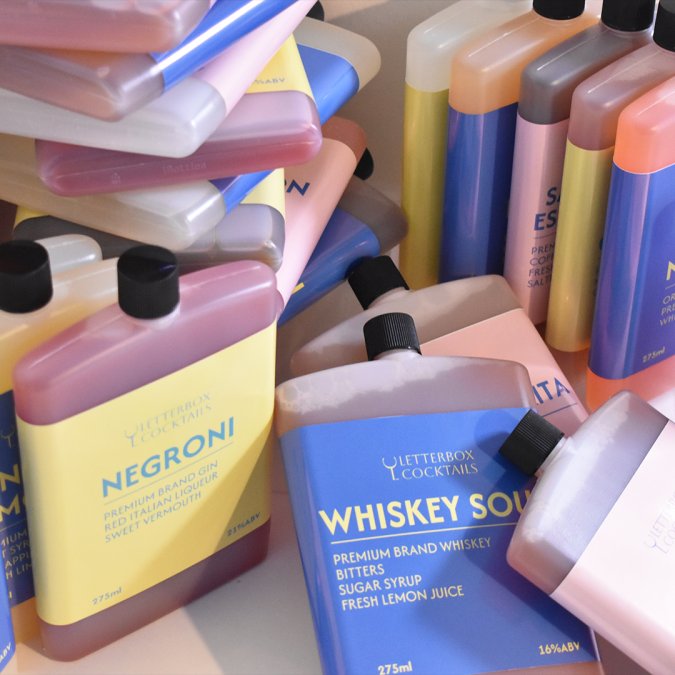
Letterbox Cocktails delivers premium, ready-to-drink cocktails directly through your letterbox, anywhere in the UK. No shaker, no jigger, no strainer, no measuring spoons. You open the box and you have a proper cocktail in your hand in under a minute.
The range covers everything from classic sours to spirit-forward builds. The Classic Sours Box at £39.95 brings together three perfectly balanced drinks with smooth spirits, zesty citrus, and rich bitters. The Premium Box at £44.95 is the one for people who want something bold and spirit-forward, with deep flavour and serious cocktail credentials.

For something bright and refreshing, the Modern Sours Box at £39.95 reimagines the classic sour with crisp gin, tropical Pisco, and botanical twists. And the Classics Box at £39.95 is a crowd-pleasing trio of iconic favourites, ideal for sharing or gifting.


If you want to tailor the selection, the build-your-own box option lets you choose your own combination. Customers consistently rate the experience five stars, with feedback highlighting the excellent presentation and the quality of the drinks themselves.
For larger occasions, Letterbox Cocktails handles wedding favours and corporate gifting too. Whether it is personalised boxes for forty wedding guests or branded cocktail gifts for a team event, the quality stays consistent at scale.
As Drinks International's guide to the ready-to-drink cocktail market notes, the premium ready-to-drink category has grown significantly in the UK as consumers prioritise quality and convenience together. Letterbox Cocktails sits squarely in that premium space.
A clean glass jar with a tight-fitting lid works brilliantly as a DIY cocktail shaker substitute. Fill it with ice and your ingredients, press the lid down firmly with both hands, and shake for around 15 seconds. A large plastic drinks bottle with a secure cap is another solid option. Just make sure whatever you use is completely sealed before you start shaking, and always hold it with both hands to keep control.
Standard kitchen measuring spoons are your best friend here. One tablespoon equals roughly 15ml, and most cocktail recipes calling for 25ml (a single measure) work out at just under two tablespoons. A teaspoon is about 5ml, which is handy for small dashes of bitters or syrups. If you want to serve cocktails with consistent flavour every time, measuring carefully matters more than the tool you use to do it.
Hold a slotted spoon or a fork across the top of your shaker or jar as you pour. The gaps catch ice and larger bits of fruit or herb, letting the liquid flow through cleanly into your glass. For a finer strain that removes small ice shards or citrus pulp, pour through a small kitchen sieve. This double-strain method gives you a much cleaner, smoother result, which is especially useful for sours and citrus-forward cocktails.
Yes, completely. A jam jar replaces a cocktail shaker, kitchen measuring spoons replace a jigger, a fork or sieve replaces a strainer, and a wooden spoon handle does the job of a muddler. The results genuinely taste great when you follow the recipe carefully. If you want to skip the mixing altogether, ready-to-drink cocktails delivered to your door, like those from Letterbox Cocktails, mean you can serve cocktails that taste like the real thing with zero effort.
This article was written using GrandRanker
Share


£19.95 GBP
Unit price per